
In my locked-down world, I’ve been finding improvements for my VHF rover operations. My wife has been doing something similar for her garden. So our packages arrive almost daily on the front doorstep and then move on to our various projects.
Nifty New Gadget
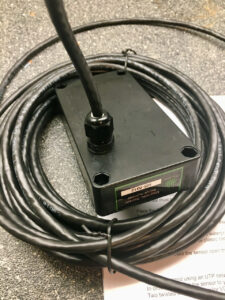
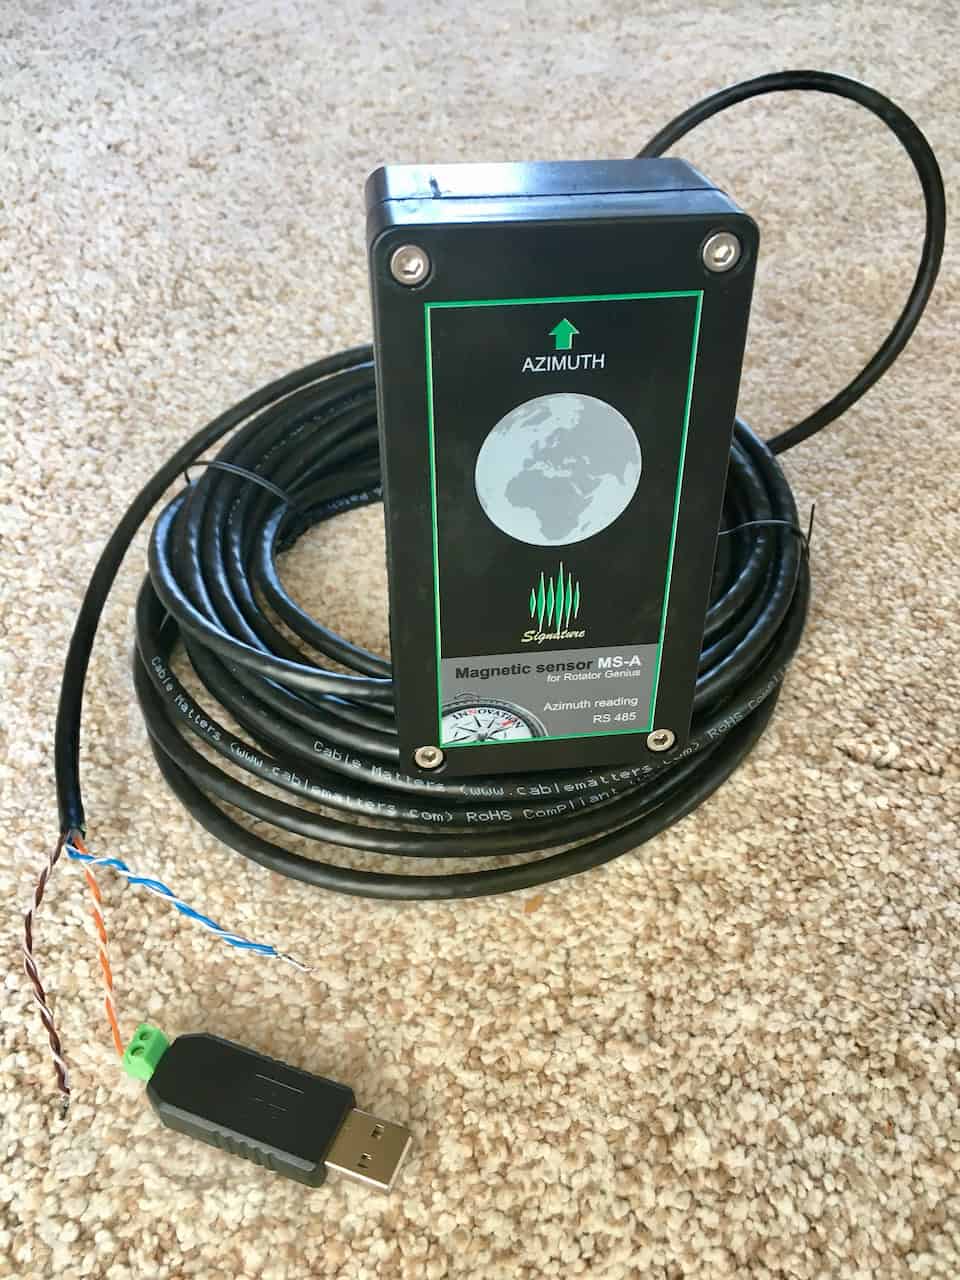 Earlier this week a package arrived from Montenegro along with some seeds from China… Not really sure about the latter, but the former held a nifty little gadget from 403A’s station automation tools. It’s called the Magnetic Sensor MS-A from their Rotator Genius line of products.
Normally, the sensor is one small option among their extensive setup for antenna and rotator control for full blown HF contest stations. But they apparently found enough interest to offer this unit separately along with a Windows app and RS-485 to USB converter.
Shipment was amazingly quick. Later I found Vibroplex sells this line of products. But the azimuth sensor is out of stock, no mention of the stand-alone app, and the USB to RS-485 converter isn’t listed. So perhaps the best option for now is to buy direct.
Pointing Rover Antennas
Many rovers run the roads using omnidirectional antennas. Others add a rack on the top with directional antennas pointed toward the front. I use a roof top rotator when I’m stopped alongside the road. I set up the rotator controller so that it’s registering south when the car is also pointing south. This works reasonably well at most of my stops, but not all.
At all the stops I typically get out of the car and use my phone’s compass app to make sure things are lined up correctly. That’s where this nifty gadget can come into play. It provides an accurate azimuth readout all the time no matter how the car is parked. I’m hopeful that this will allow me to more accurately point my antennas and do so quickly at each stop. Plus, it’s something cool to add to the station.
Gadget Assembly
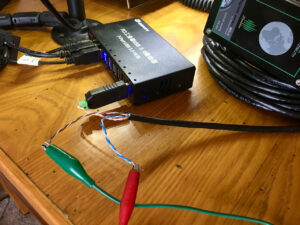
 There’s not much to the assembly and the directions are very clear. Mostly it’s finding the necessary length of Cat5/6 cable and connecting one end to the sensor and the other to the RS-485 to USB converter. That’s also where 13.8 VDC is added to the mix.
I used a 30 foot length of Cat6 which matches my coax cable lengths in the rover. I don’t need quite that length for the roof top rotator but every once in a while I’ll use a push up mast as a rover where I do need that length.
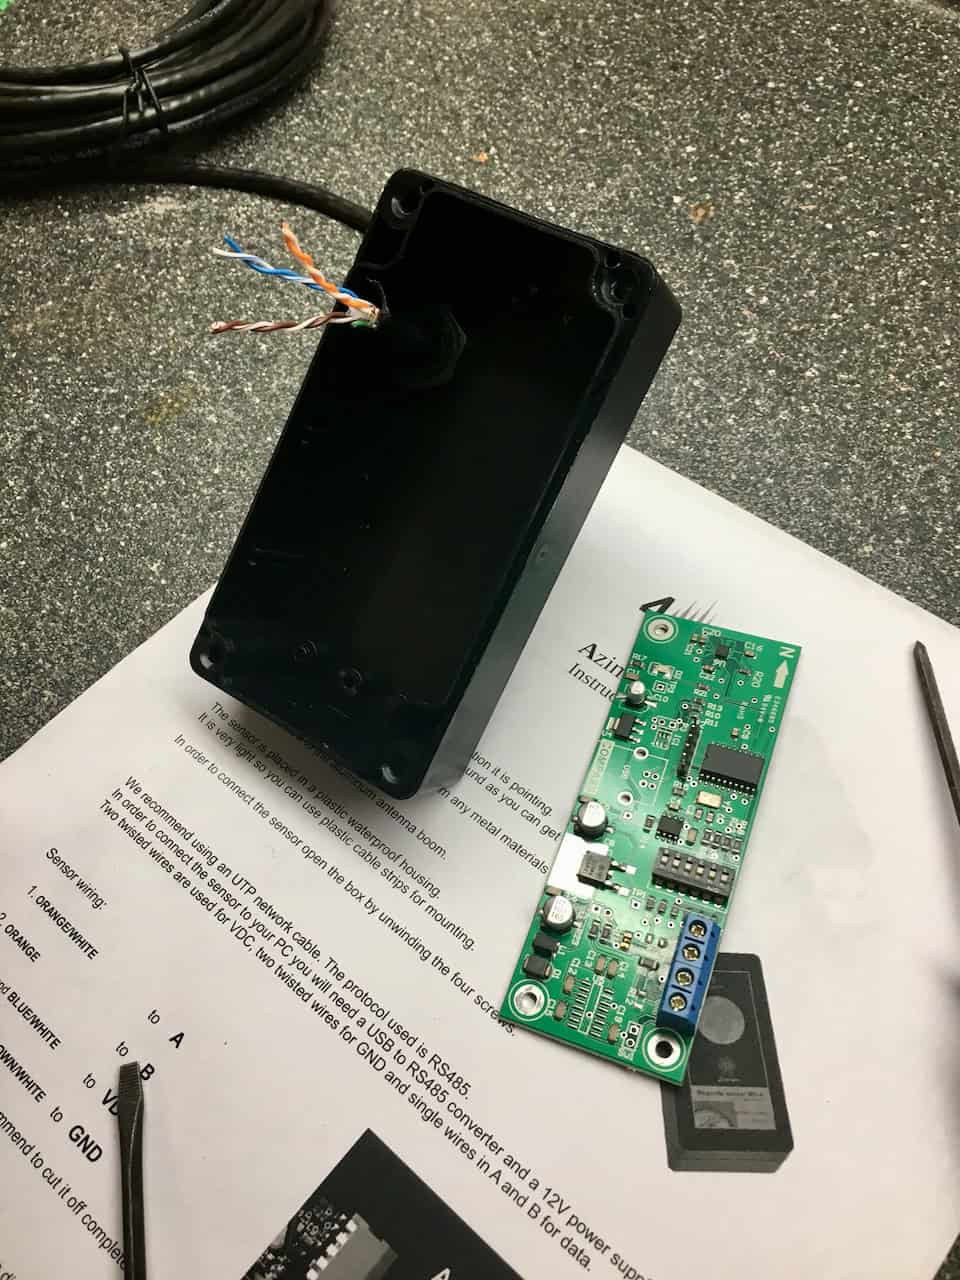
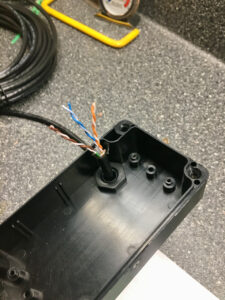
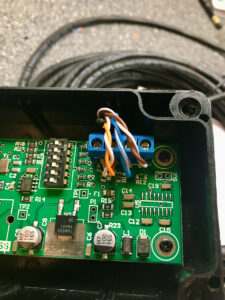
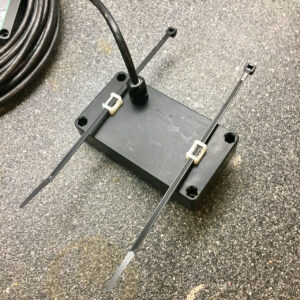
The box that houses the sensor circuit board has a waterproof entrance point for the cable. I needed to first place the threaded cap on the cable, remove the grey rubber piece and move it onto the cable then place it all within the opening on the box. Tightening it all down makes it water tight. There are then 4 wire connections within the sensor box via a connector block with screws. I tinned the stranded wires before making the connections.
At the other end, there are two wires for the data connection and two for the 13.8 VDC. This is an area for improvement in my installation. It looks pretty fragile for a rover installation. I will probably find a plastic box or some similar approach to making the connections and routing the cable to the sensor and the cable to the USB port.
Magnetic Sensor App
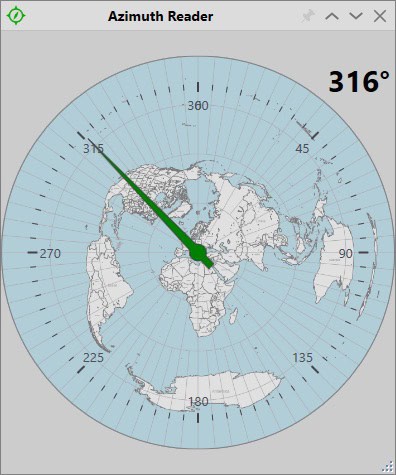 The app appears to work great. It is sensitive to nearby ferromagnetic materials. But moving it up off my shack desk and moving it around provides instant and accurate readout of the bearing. Right now the app shows a world map centered on what appears to be Montenegro. I’ve made an inquiry into how I can change the map, or even substitute a compass rose.
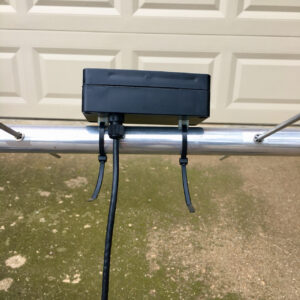
The sensor is meant to attach to the aluminum boom of your antenna. My rover mast is also aluminum. So I’ll probably mount it on the boom near the mast. They suggest using cable ties for the mounting.
I’ll probably need to do some experimenting with the mount. First getting it set up for a correct readout and then making sure it doesn’t fly off while I’m going down the road.
This is one more improvement for my VHF rover operation. I’m looking forward to putting it into play during the ARRL January VHF Contest. It’s all about continuous improvement, comparing overall operator and results from one contest to the next. That’s one of many things that make this hobby fun.
Update on Application Map
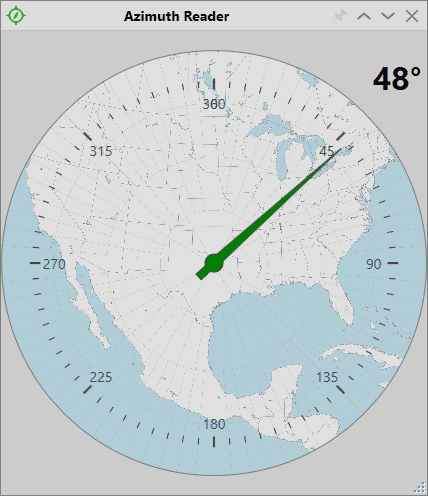 I used the 4O3A forum to ask how best to update the application map. They responded quickly pointing me to https://ns6t.net/azimuth/ where you can generate all sorts of azimuthal maps centered on your location as well as adjust the distance from your location to be plotted.
That generates a PDF. From there you’ll need to trim the file to include only the map and then export it to a PNG file. Then in the app, right click and it will ask if you want to load a new background image. Click yes, select your file, and you’ll have a new map background.
The one I generated is shown nearby. I selected my home grid, EM12kv, and 2,600 miles distance for VHF coverage. I used Photoshop to trim off the map’s degree markings around the outside edge. Good stuff.
Update on Mounting
I’ve been doing a little experimenting with the mounting system for the antenna boom. I have a few zip tie screw-on mounts that came with a balun. Drilled two holes and have that all set. You can see how it fits in the nearby photos. I also plan to use a velcro strap to wrap around the boom and sensor to help with the high wind exposure while driving down the highway.
I also tested to make sure the two additional metal screws/nuts would not upset the magnetic sensor. Nothing seen. Of course, the box itself is screwed together with metal screws along with screws to mount the pc board. So should be just fine. If there is an effect, it should at least remain consistent. Next is working on a USB interface box that is more robust for my rough and tumble rover installation.


[…] may have read about some of my improvement. I’ve added an Azimuth Sensor to help me point my antennas. I’m looking forward to seeing how this works on the […]
[…] also had a few challenges with the 4O3A Azimuth Sensor. It would lock up, typically after the drive to the next grid. See improvement thoughts […]